Getting started with ROS4HRI using devcontainers
‼️ this is a ROS 1 tutorial
While the concepts and tools presented here are still relevant, the code examples are using ROS 1 (Noetic). If you are looking for a ROS 2 tutorial, please check the ROS 2 tutorial.
Start the GitHub Codespaces
Start the Github Codespaces by clicking on Code, then Codespaces.
Connect to the remote desktop

In the Codespaces’ VSCode interface, click on the PORTS tab (next to
TERMINAL), and click on the Forwarded Address URL next to the 6080 port forward. Click on the
small globe icon to open a VNC connection to the remote desktop. The password is
vscode.
This desktop environment is connected to the Codespaces: any GUI application
that you start from the Codespaces’ terminal (like rviz) will open in the remote desktop.
Prepare the environment
Initial environment preparation
Your environment (called a devcontainer) is based on ROS noetic with some additional tools. It is ready to use for our tutorial.
Let’s simply create a basic ROS workspace, so that we can compile ROS nodes:
mkdir -p ws/src
cd ws
catkin init
catkin config --install
cd ..
Playing ROS ‘bags’
ROS bags are files containing ROS data (ROS messages) that have been previously recorded. We can play ROS bag to re-create the datastream as they were when they were recorded.
Start ROS
In the same terminal, source your ROS environment:
source /opt/ros/noetic/setup.bash
💡 each time you open a new terminal, you first need to source your ROS environment with this command.
Then, start roscore
roscore
Download the bag files
I have prepared some bags for today’s tutorial. Download them with wget:
First, open a new terminal by clicking on the + at the right of the terminal
panel.
💡 you can rename your terminals by right-clicking on them. For instance, name the first one
roscoreand the second onebags.
mkdir bags
cd bags
wget https://skadge.org/data/severin-head.bag
wget https://skadge.org/data/severin-sitting-table.bag
cd ..
💡 if you are running this tutorial on your computer directly (ie, not in a devcontainer, you can use your webcam directly (instead of the bags file):
First install
usb_cam:apt install ros-noetic-usb-camThen, start it, with the provided calibration file (or your own, if you have a calibrated camera):rosrun usb_cam usb_cam_node _camera_info_url:="file:///`pwd`/default_webcam_calibration.yml"
Display the content of the bag file
Source the ROS environment, and play the pre-recorded bag file:
source /opt/ros/noetic/setup.bash
rosbag play --loop bags/severin-head.bag
Type rostopic list to list the available ROS topic (ie, the ROS data
channels). You should see at least /usb_cam/image_raw that contains the raw
image pixels data.
Open yet another terminal, source ROS, and open rqt_image_view:
source /opt/ros/noetic/setup.bash
rqt_image_view
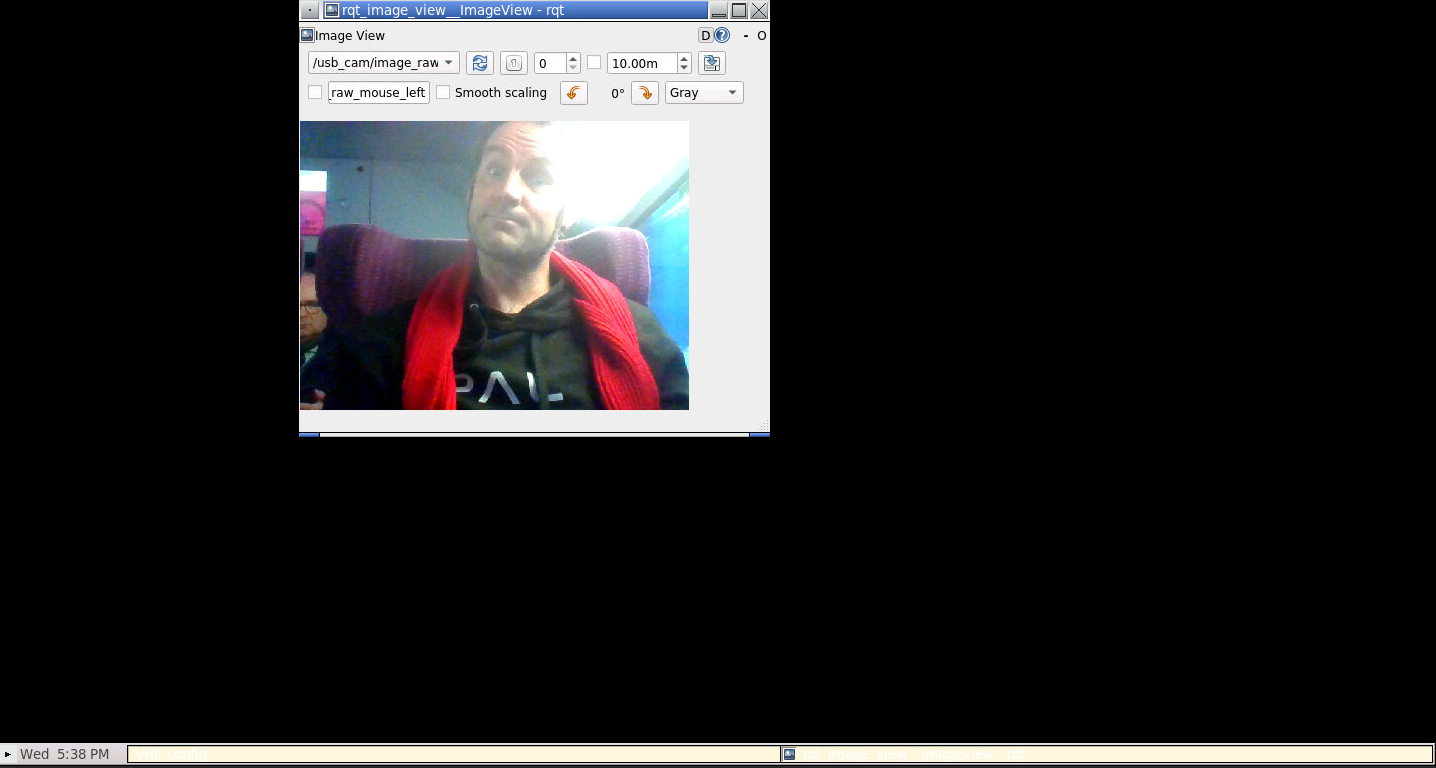
Switch to the remote desktop tab. You should see the RQT image_view
interface. Select the /usb_cam/image_raw topic in the drop-down list. It
should display the video stream.
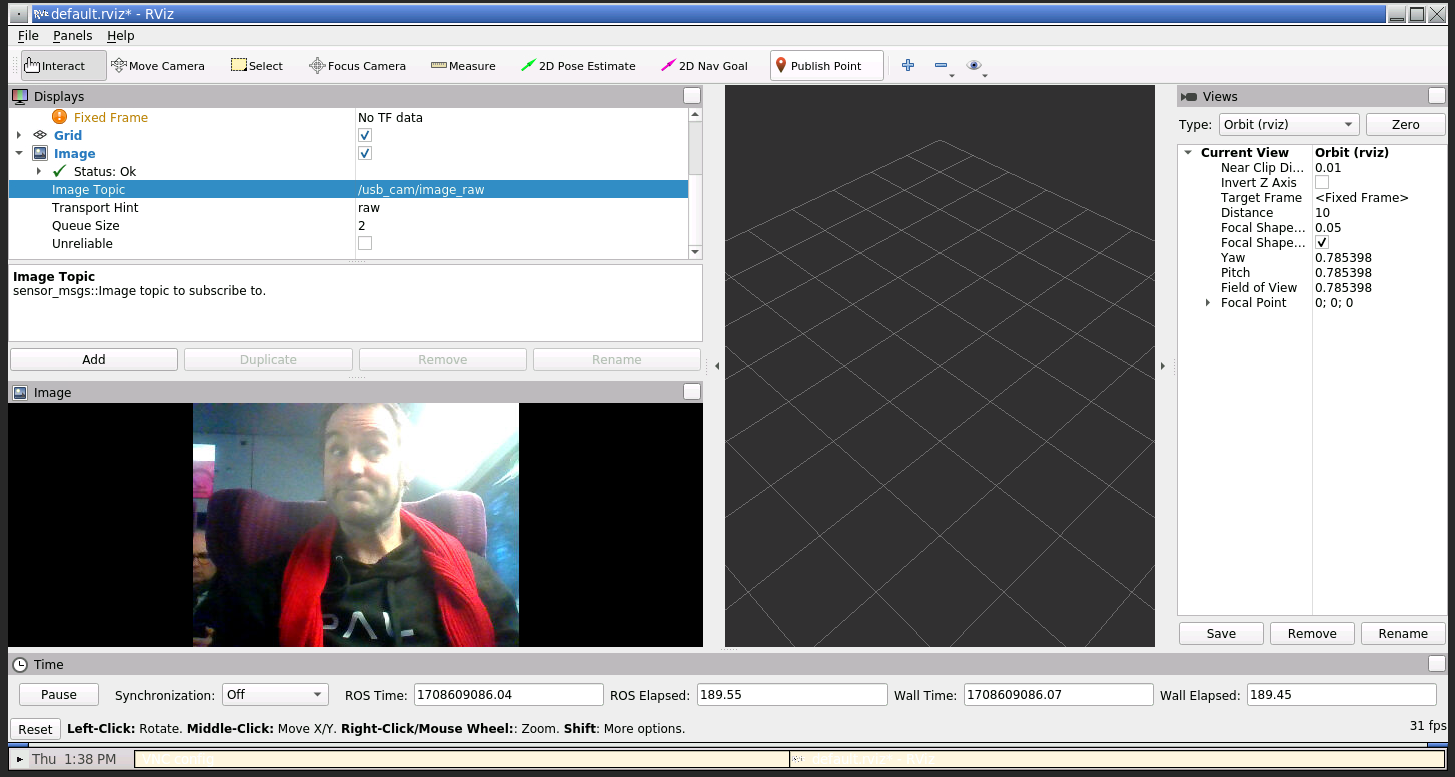
We can alos visualize the bag file in rviz, the main ROS tool for data
visualization. Stop rqt_image_view (either close the window, or press Ctrl+C
in the terminal), and start rviz instead:
rviz
Add an Image plugin, and select the /usb_cam/image_raw topic like on the
screenshot below:
Face detection
Install hri_face_detect
We first want to detect faces in our test bag file.
We will use a ROS4HRI-compatible node for that purpose: hri_face_detect
To install it:
First, let’s get the code:
cd ws/src
git clone https://github.com/ros4hri/hri_face_detect.git
cd ..
Then, build it:
source /opt/ros/noetic/setup.bash
catkin build hri_face_detect
💡 all the dependencies are already included in your container, so the build step should work straight away. Otherwise, you would have had to install manually
mediapipe(pip3 install mediapipe) and all the other ROS dependencies (rosdep install -r -y --from-paths src).
Start the face detection node
The hri_face_detect node has been installed in the install/ subfolder. We
need to tell ROS to look into that folder when starting a node. Type:
source ./install/setup.bash
Then, you can start the face detection node, remapping the default image topic to the one actually published by the camera:
roslaunch hri_face_detect detect.launch rgb_camera:=usb_cam filtering_frame:=head_camera
You should immediately see on the console that some faces are indeed detected. Let’s visualise them.
Visualise the result
Open another terminal, and source ROS.
We can check that the faces are detected and published at ROS message by simply typing:
rostopic echo /humans/faces/tracked
We can also use rviz to display the faces with the facial landmarks.
Then, in rviz, set the fixed frame to head_camera, and enable the Humans and TF plugins:
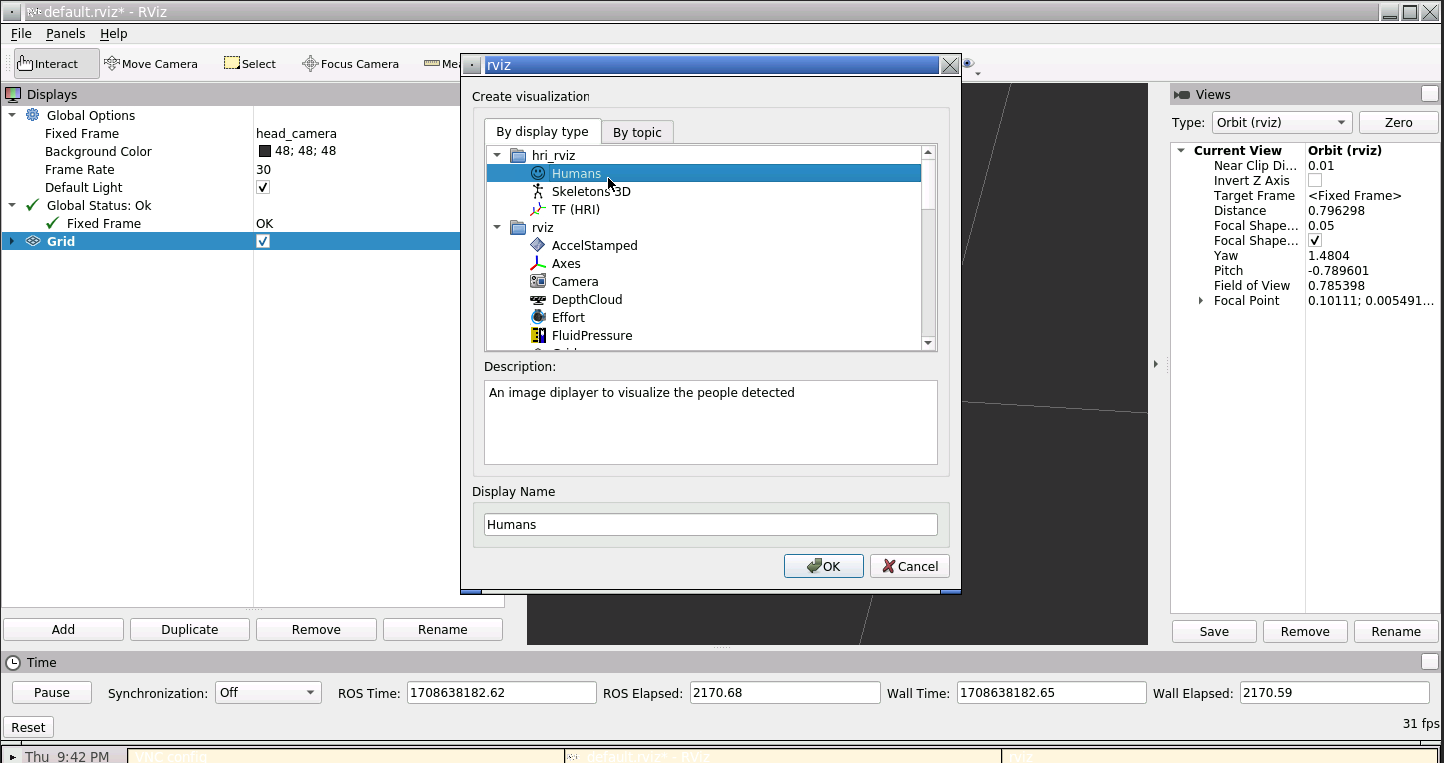
Configure the Humans plugin to use the /usb_cam/image_raw topic. You should see the
face being displayed, as well as its estimated 6D position:
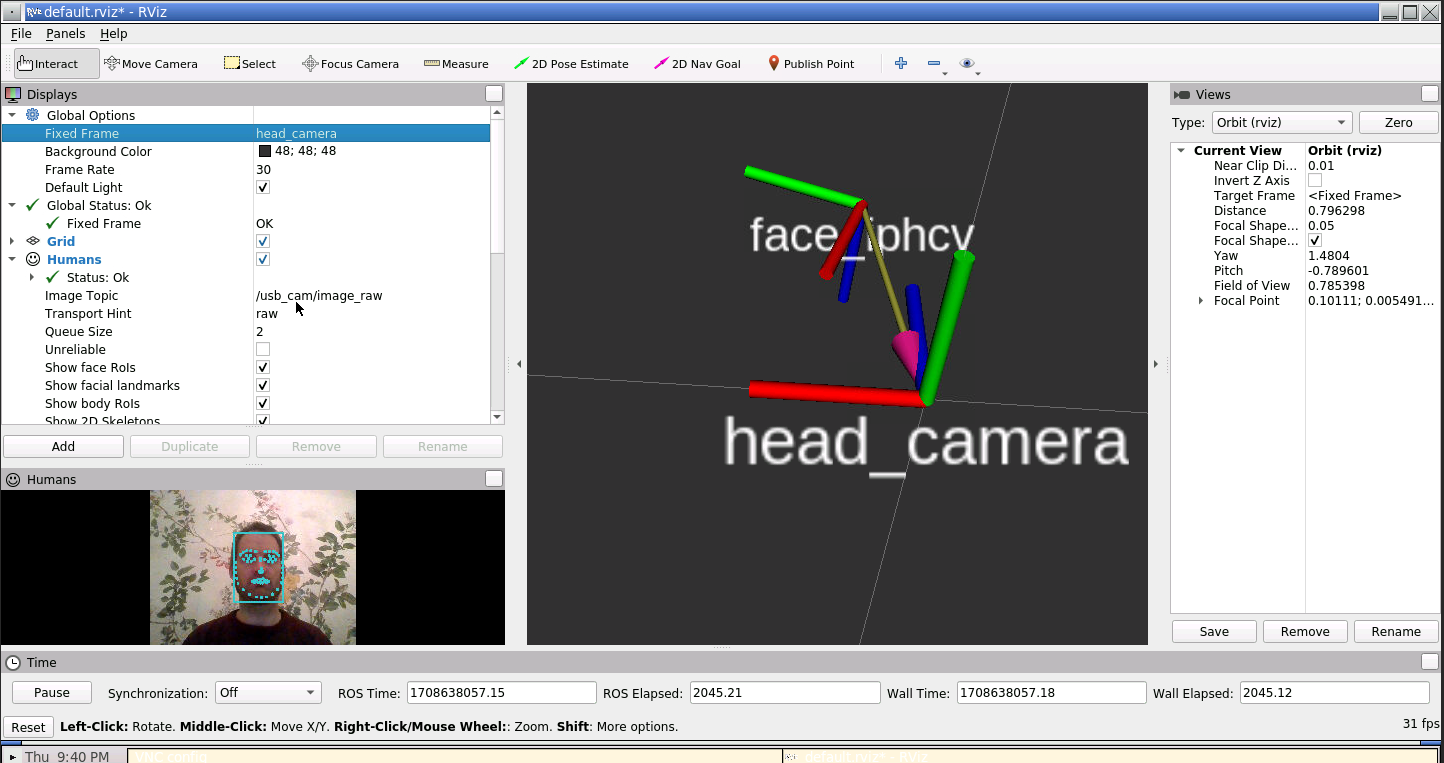
We are effectively running the face detector in a Docker container, running in a virtual machine somewhere in a Github datacentre!
Install hri_fullbody
Next, let’s detect 3D skeletons in the image.
We will use the ROS4HRI-compatible hri_fullbody node.
To install it:
First, let’s get the code:
cd ws/src
git clone https://github.com/ros4hri/hri_fullbody.git
cd ..
Then, build it:
catkin build hri_fullbody
💡 again, all the dependencies are already installed. To do it manually:
pip3
install mediapipe ikpy
followed byrosdep install -r -y --from-paths src.
Start the body detection
First, go back to the terminal playing the bag file. Stop it (Ctrl+C), and start the second bag file:
rosbag play --loop --clock severin-sitting-table.bag
Now, open a new terminal, and source install/setup.bash (this will also
automatically source /opt/ros/noetic.setup.bash):
cd ws
source install/setup.bash
Start the body detector:
roslaunch hri_fullbody hri_fullbody.launch rgb_camera:=usb_cam
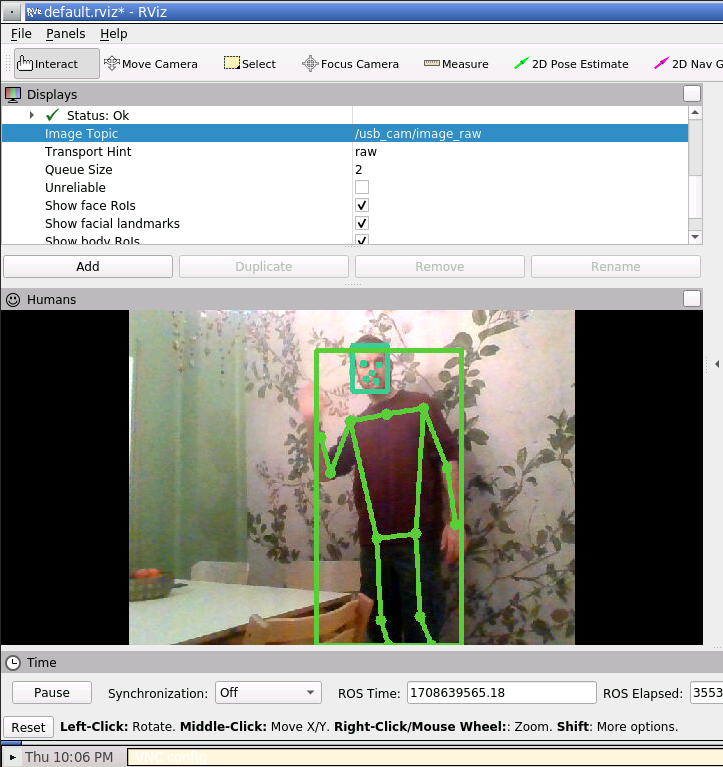
Re-open the browser tab with rviz: you should now see the skeleton being
detected, in addition to the face:
‘Assembling’ full persons
Now that we have a face and a body, we can build a ‘full’ person.
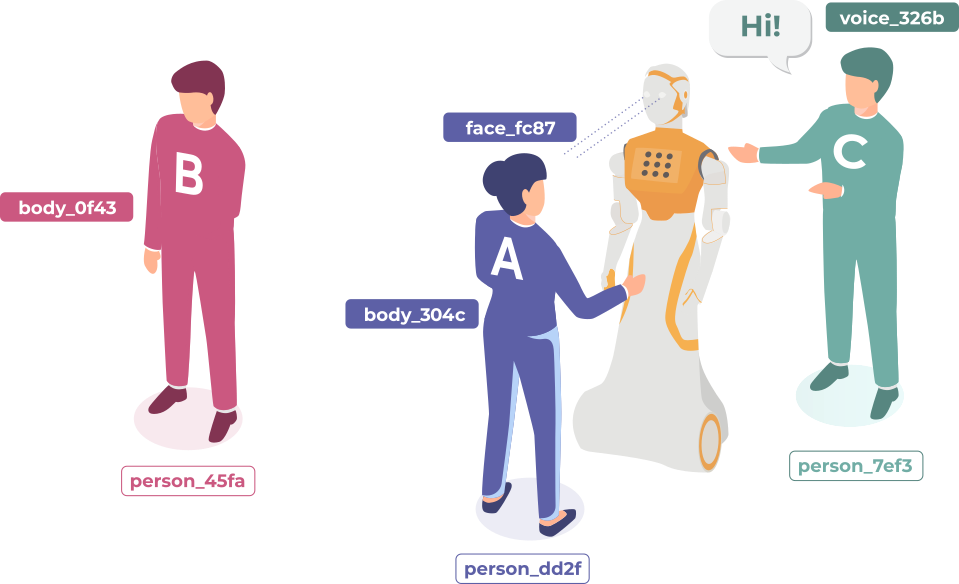
Until now, we were running two ROS4HRI perception module: hri_face_detect and
hri_fullbody.
The face detector is assigning a unique identifier to each face that it detects (and since it only detects faces, but does not recognise them, a new identifier might get assigned to the same actual face if it disappears and reappears later); the body detector is doing the same thing for bodies.
Next, we are going to run a node dedicated to managing full persons. Persons are also assigned an identifier, but the person identifier is meant to be permanent.
First, to avoid generating too many new people, we are going to only publish the
few same frames from the video. Switch back to your rosbag terminal. Stop the
current bag (Ctrl+C), and run:
rosbag play --loop --clock -s 3 -u 1 severin-sitting-table.bag
Then, open a new terminal and install hri_person_manager:
cd ws/src
git clone https://github.com/ros4hri/hri_person_manager.git
cd ..
catkin build hri_person_manager
Source again install/setup.bash, configure some general parameters (needed
because we are using a webcam, not an actual robot, check the doc to know more), and start
hri_person_manager:
source install/setup.bash
rosparam set /humans/reference_frame head_camera
rosparam set /humans/robot_reference_frame head_camera
rosrun hri_person_manager hri_person_manager
If the face and body detector are still running, you might see that
hri_person_manager is already creating some anonymous persons: the node
knows that some persons must exist (since faces and bodies are detected), but it
does not know who these persons are (you can ignore the warning regarding TF
frames: they come from the use of bag files instead of real ‘live’ data).
To get ‘real’ people, we need a node able to match for instance a face to a unique and stable person: a face identification node.
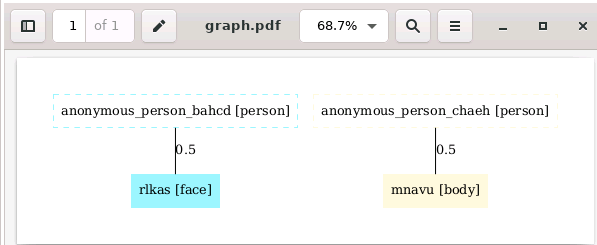
Display the person feature graph
We can use a small utility tool to display what the person manager understand of the current situation.
Open a new terminal and run:
source /opt/ros/noetic/setup.bash
cd ws/src/hri_person_manager/scripts/
./show_humans_graph.py
In a different terminal, run:
evince /tmp/graph.pdf
You should see a graph similar to:
Connecting the person feature graph
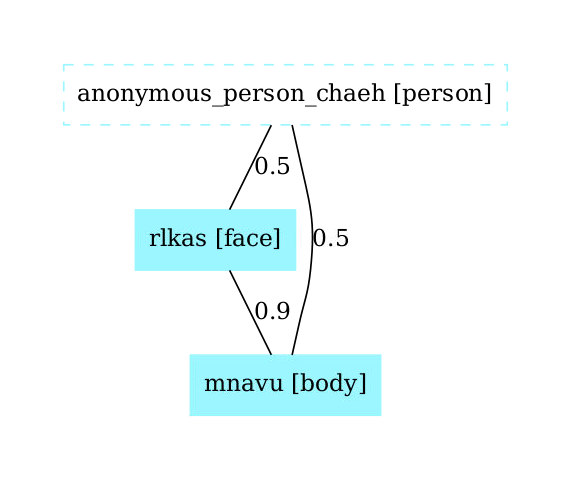
First, let’s manually tell hri_person_manager that the face and body are
indeed parts of the same person. TO do so, we need to publish a match between
the two ids (in this example, rlkas (the face) and mnavu (the body), but
your IDs might be different, as they are randomly chosen)
In a new terminal (with ROS sourced):
rostopic pub /humans/candidate_matches hri_msgs/IdsMatch "{id1: 'rlkas', id1_type: 2, id2: 'mnavu', id2_type: 3, confidence: 0.9}"
The graph updates to:
⚠️ do not forget to change the face and body IDs to match the ones in your system!
💡 the values
2and3correspond respectively to a face and a body. See hri_msgs/IdsMatch for the list of constants.
Manually identifying the person
To turn our anonymous person into a known person, we need to match the face ID (or the body ID) to a person ID:
For instance:
rostopic pub /humans/candidate_matches hri_msgs/IdsMatch "{id1: 'rlkas', id1_type: 2, id2: 'severin', id2_type: 0, confidence: 0.9}"
The graph updates to:
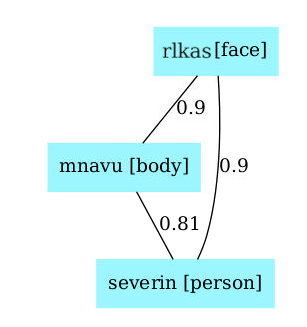
Know that the person is ‘known’ (ie, at least one person ‘part’ is associated to a person ID)m the automatically-generated ‘anonymous’ person is replaced by the actual person.
We are doing it manually here, but in practice, we want to do it automatically.
Installing and running automatic face identification
Let’s install the hri_face_identification node:
cd ws/src
git clone https://github.com/ros4hri/hri_face_identification.git
cd ..
Then, build it:
catkin build hri_face_identification
💡 again, all the dependencies are already installed in the container. To do it manually, run
rosdep install -r -y --from-paths src.
Start the node:
source install/setup.bash
roslaunch hri_face_identification face_identification.launch
You can now check in the graph (or directly on the /humans/candidate_matches
topic): the face should now be automatically associated to a person.
Probabilistic feature matching
The algorithm used by hri_person_manager exploits the probabilities of match
between each and all personal features perceived by the robot to find the most
likely set of partitions of features into persons.
For instance, from the following graph, try to guess which are the most likely ‘person’ associations:

Response in the paper (along with the exact algorithm!): the ‘Mr Potato’ paper.
If you want more…!
Here a few additional tasks you might want to try, to further explore ROS4HRI:
-
Write a small Python script that list on the console the people around the robot (hint!).
-
write a node (C++ or Python) to automatically match faces and bodies. One approach consists in computing the overlap of the regions of interest of pairs of (face, body), and compute a likelihood based on that.
Check the
pyhriAPI documentation here, and the C++libhriAPI documentation here.